Hi, I am Cristina, a journalist passioned about interior design and the world of colours.
Showing posts with label News. Show all posts

Friday, 23 December 2016

The Christmas baubles are nowadays the most popular ornaments for the traditional Christmas tree. You can't even imagine a tree without the baubles, right? At the beginning of Christmas celebrations as we know them today, the trees were adorned with natural elements like apples, candies or pine cones, but since the invention of the glass baubles, the history of the Christmas decorations changed completely.

krebslauscha.de
The glass baubles were invented in the small town of Lauscha, in Germany, by Hans Greiner (1550-1609) and Christoph Müller. The little town, located in a river valley in the German state of Thuringen, had the necessary elements for glass-making: timber and sand. So, in 1597, Müller and Greiner opened the Glashütten ("glassworks") in Lauscha. First, they started producing garlands of glass beads and tin figures that could be hung on trees.The original Lauscha ornaments in shape of fruits and nuts soon grew into the production of artistic glass figures made by highly skilled artisans.

The baubles were so popular, that other glassblowers in Lauscha began producing them in a wide variety of designs and soon the whole of Germany started buying the Lauscha Christmas ornaments. Lauscha started exporting its products throughout Europe after Queen Victoria of the United Kingdom decorated the Christmas tree with the glass baubles received from her German husband Prince Albert. In the 1880's, American F.W. Woolworth discovered the Lauscha baubles during a visit to Germany and started importing them to the United States.

krebsglaslauscha.de
glasmarkt-lauscha.de

Today, there are still 20 small glass-blowing firms in Lauscha that produce glass baubles. You can find at the end of this article a list with some of these. They might be a bit more expensive than the plastic or the big-scale production glass baubles, but they are worth it. The Lauscha baubles are a part of the history and of the Christmas traditions in Europe.


Glass-baubles companies in Lauscha:


Friday, 9 December 2016

Christmas is my favourite holiday and I just can't imagine it without the wonderful decorated Christmas tree. But, in the same time, I know that this tradition isn't quite environmental friendly (which is a very important subject for me) and there's a little battle going on in my mind: should I give up the nicest Christmas tradition and do a good deed for the planet? Well, fortunately there is a great solution to this problem: use a Christmas tree in a pot!

blogarredamento.com 
You can find tree in pots almost everywhere now, but remember to ask your supplier where the trees come from and choose a locally grown tree. The big advantage of the potted tree is that it allows you to grow it outside and use it again next year, reducing the environmental impact. If you can't take care of the potted tree until the next Christmas, then you can rent one from a specialized company. They will bring the tree in a pot at your home, then they will take it after the holidays and replant it at their tree farm until next Christmas. You can even buy it and use the same potted tree year by year.

olebich.de

Before getting to the decorating ideas, I have gathered here a few tips on caring for the potted Christmas tree.

  • To make sure the tree will last in the house for the holiday season, it would be best to display it in a cool room (when possible). If not, keep it away from the heaters and bring them indoors as late as possible - a few days before Christmas would be ideal. 
  • Do not keep living tree in the house any longer than 10 days, but if it looks unhappy, put it back outside even sooner. Be sure it gets all the water it needs. 
  • After Christmas, you can plant the tree in your garden or send it back to the tree nursery.
  • If you're using lights for decorating the living Christmas tree, make sure the light bulbs don't heat too much - LED lights would be better.
  • Use ornaments that are not too big, so you won't destroy the branches.

blog.fjeldborg.no
A perfect eco-friendly Christmas would mean a living Christmas tree decorated with eco-friendly ornaments - made of wood and other natural or recycled materials, and lighted with solar power. You can go completely eco or just stick to the living tree, it's your choice and it depends on the budget and time available. If you want to try it, here are some ideas:

  • You can buy or create ornaments made of natural materials, like organic cotton, silk, hemp, wood.
  • You can recycle various items and transform them in new ornaments.
  • Remember that less is more in decorating - do not overuse ornaments. Clutter does not look good. 
  • Use energy-efficient LED lighting. The LED bulbs can save 90% on power costs and will last longer.
  • For the gifts, use sustainable wrapping paper or any other natural material.

Wednesday, 23 November 2016

The Christmas feast is one of the best moments of this wonderful holiday. Therefore, we also have to pay a little bit of attention to the way we decorate the table. It will certainly impress your guests!

It's important to match the table decorations with the ones in the Christmas tree and stick to the same decorating style. Do not clutter the table with too many ornaments or too many colors and try to keep it simple and elegant.

Here are some beautiful ideas for decorating your Christmas table. Enjoy!

rouvajonesinkotona.blogspot.com

You can use any colour you want, as long as it sticks to the entire home theme

You can go for an entire red theme

You can choose a more elegant, metallic option

You can add bold colours, like mustard and purple

Or you can keep it white and blue, for a winter feeling

The table could be a center point for your Christmas home decor

You should always match the table decor with the one in the room

Christmas in red and yellow

You can add some funny chair pillows, for more comfort

The decor can also be extremely simple, but very nice

You can keep it all white

Tuesday, 25 October 2016

I prefer to see Halloween as an opportunity to have my house decorated with all sort of funny items: funny pumpkins, funny spiders, funny black cats and well... the normal Halloween decor but in the funny version. Of course, this is just a matter of taste, but for the ones who think like me, I gathered here some really funny pumpkin ideas.

Photo: simpleasthatblog.com
First of all, I chose only pumpkin ideas that require only painting and some decoupage but not carving. I consider this to be much easier and it doesn't require too much talent :) . All you need is some paint - spraying paint for the pumpkin itself would be just perfect... if not, any kind of paint you can find, paper and glue. Of course, you can add more ingredients - it depends on the final effect.

10. The bat and the cat

Photo:homebnc.com
It's such a great project for kids... and for me, too, I have to confess :D. You need to paint in black two pumpkins and then create the animals elements from heavy craft paper, as you wish. The next step is to stick the paper elements on the pumpkins and tadaaa... you have a really funny pumpkin for Halloween.

9. Minion pumpkins

Photo: www.craftymorning.com
Easy to do and very funny! The minion pumpkins also require only painting and some coke cans for the eyes. More instructions about how to DIY the minions and the evil minions you can find on craftmorning.com. 

8. BB-8 Star Wars pumpkin

Photo: family.disney.com
Perfect for the Star Wars fans! According to Disney, it takes 3 hours to transform two pumpkins in BB-8. If you love the ideas, then you can try it step by step, following the instruction on the Disney blog. 

7. Harry Potter owl pumpkin

Photo: www.buzzfeed.com
A tiny bit more difficult to create, but it's worth it! Take one big pumpkin and two identical small ones...it could work with two little different ones, too - it won't look exactly like Hedwig the owl, but it will definitely be very funny :D.  We also need two identical pinecones, craft paper, white paint, glue and a little green melon for the beak.

6. Donut pumpkins

Photo: studiodiy.com
Great for a different kind of Halloween. If you want to try something new, then this would be a sweet idea! All you need is a pumpkin (or more, it depends on how many "donuts" you want) and paint. You can check the tutorial at studiodiy.com.

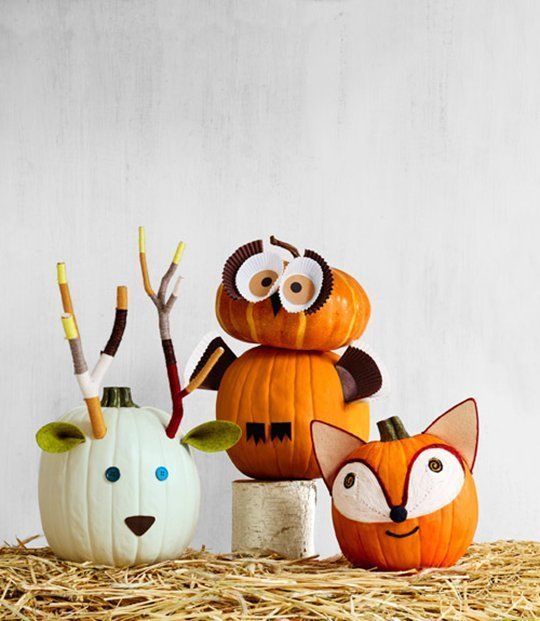
6. Animals of the forest

Photo: www.countryliving.com
They're not scary at all, but so cute! For these ones you will need more materials, like branches or muffin baking paper - not just paint anymore, but the time invested will have great rewards! For the reindeer, you can use a simple white pumpkin - so you won't need to paint it. At countryliving.com you can find more details about how to DIY these really, really cute pumpkins.

5. The fluffy spider pumpkin

Photo: www.rachaelraymag.com
It looks much more difficult to do than it's actually is. Paint a pumpkin in black, then glue to it six pipe cleaner, bending them to look like spider legs. At the end, glue the eyes.

4. Ghostly pumpkins

Photo: homemydesign.com
Cute, funny and easy to DIY! Take 4 long pumpkins, paint them in white and you're almost done. You will need to paint their eyes in black and to add some accesories, which you can buy in almost every decor store.

3. Olaf from Frozen pumpkin

Photo: thebubblybay.com
If you or your kids love Frozen, then you will also love this! Like most of the ideas I showed you here, it's very easy to create. Take three pumpkins, from which one has to be the longer type. Paint them in white and then paint Olaf's face with black. Add some branches as hands and a little blue scarf. As for the nose, you can paint it in orange or just glue a carrot. Thanks to thebubblybay.com for the tutorial. 

2. Inspiration from your pet

Photo: www.parents.com
The author from www.parents.com inspire himself from his pug, Ralph, and created his "pugkin" version. I will definitely try to make the pumpkin version of my own dog, a very fluffy Samoyed.  

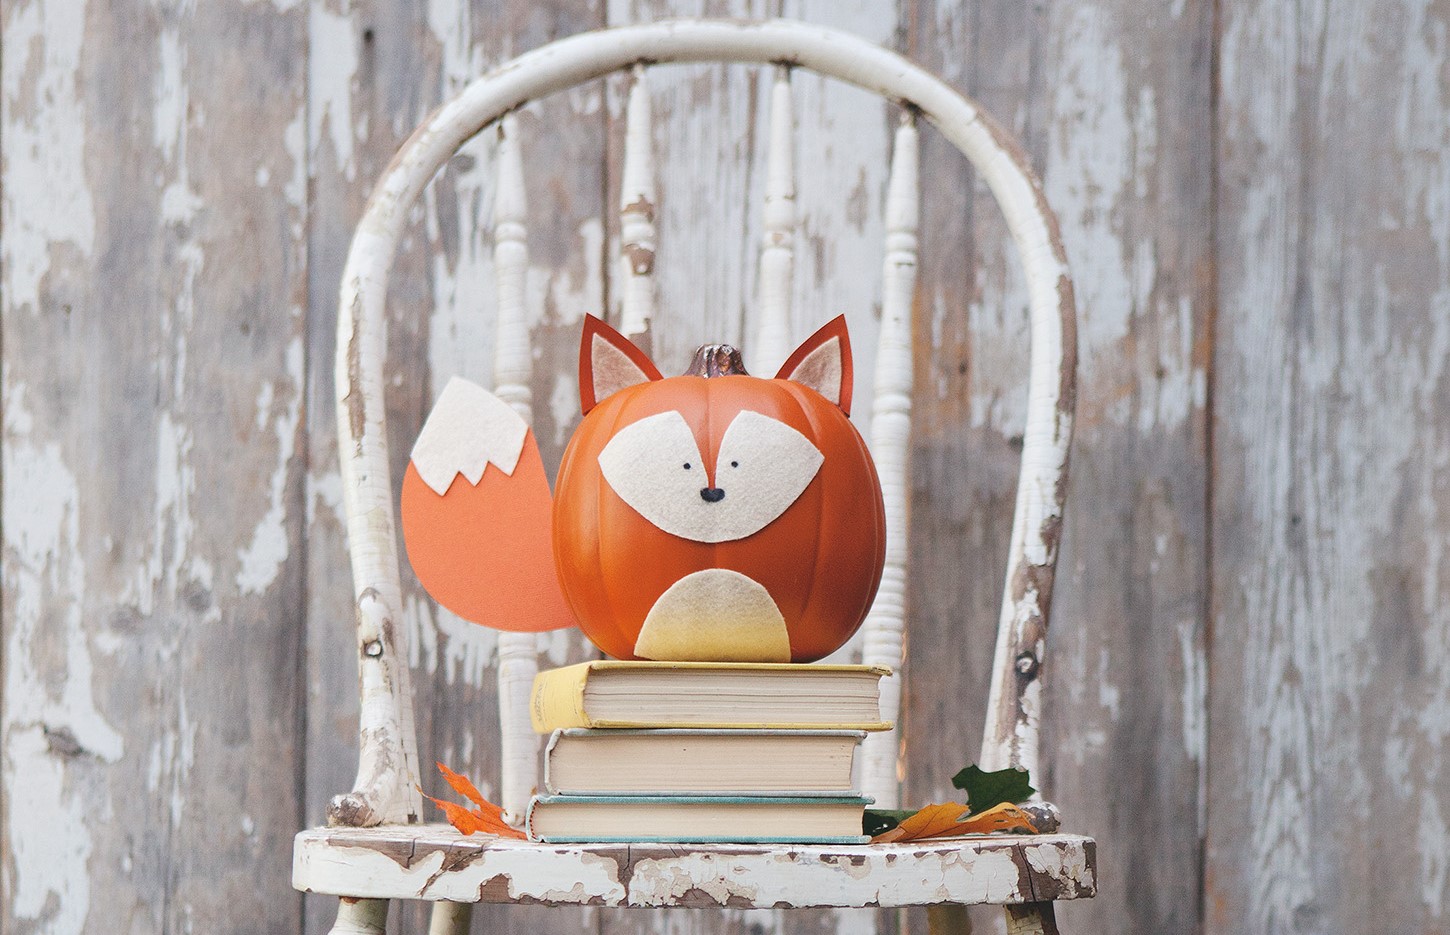
1. Funny little animals

Photo: simpleasthatblog.com
These three cute pumpkins are my favourites! Especially the fox and the raccoon! You can find all you need to know about them on simpleasthatblog.com

So, have fun while crafting this year's Halloween pumpkins and share with us your creations! 

Friday, 21 October 2016

It's almost the spookiest time of the year again and everybody is getting ready for the Halloween parties. Even if you're not hosting one, but you would like to enter the spirit of this holiday, here are some tips for decorating your home with style.

Photo: micasadc.com

Tips before starting

Of course, the main Halloween theme is horror, but if you have small children, use funny decorations - you don't want to scare them too much. There are lots of funny pumpkins, spiders or creatures ready to deck your house.

The traditional colours are orange and black, but according to this year's trends we can also use metallic colours like bronze, gold and silver and also lots of white. Of course, you can personalize as you wish - there are some pretty cool pink or blue Halloween decorations, too!

And you shouldn't forget the pumpkin - in any form or colour you want. The pumpkin carving is also a very funny activity for you and your family or friends! A small tip: while carved pumpkins can hold up to a week, the whole ones can last up to a month! And for special effects, you can add candles or lights inside them.

It's important to not over-decorate. A house with too many decorations in too many different styles becomes overcrowded and not stylish anymore. You should choose one theme, in 2-3 main colours and stick to it.

Do not use too much light in the house: less is better. If you can use only some candles, it would be spookier!

So, think about the theme and colours and start with the porch and the front door. If you have a fireplace, then its mantle will be a perfect place for a little Halloween exhibition, if not... you can use a shelf or a table.

And remember: less is more.

Halloween wreath for the front door


Photo: www.etsy.com
Photo and tutorial: tatertotsandjello.com
Photo and tutorial: www.craftaholicsanonymous.net

Chic decorations for the porch


Photo: www.allthingsheartandhome.com
Photo: www.magment.com

Photo: www.magment.com

Decorate the fireplace (or a shelf ;) )


Photo: www.goodhousekeeping.com

Photo: www.grandinroad.com
Photo: www.homestoriesatoz.com


Use metallic pumpkins


Photo: 

Photo: 

Photo: designdininganddiapers.com

Decorate the table


Photo: inspiredbycharm.com
Photo: www.tabledecoratingideas.com
Photo: www.orientaltrading.com

Make a Halloween tree

Photo: pinterest.com


Social

Find us on Facebook and Pinterest

Total Pageviews

Translate

Contact us

Name

Email *

Message *